🐍 Training with Hydra
\
Starting a new Project
First we need to install the nix package manager from here (multi-user installation).
Following steps are necessary to create a new Project:
- Creating a nix environment
- Adding project dependencies
- Adding Hydra jobs
- Push and execute
1. Creating a Nix environment
We need to create an flake.nix (Template) file and then run git add . and nix develop to enter our environment and we use the exit command to exit our environment. The flake.lock file is generated automatically to lock the project dependencies versions. If an update is necessary we can use the nix flake update command. To check if our file is executable on the hydra we first check our environments by using the nix flake check command. When starting a new project we delete the flake.lock-file to receive the newest dependency versions.
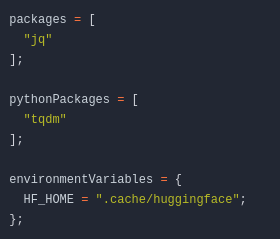
2. Adding project dependencies
Since most of our projects require Python we have an additional list called pythonPackages there we can add all our python dependencies. For all other dependencies we use the packages-list to add them. Lastly we can define any environment variables in envrionmentVariables-attrset.
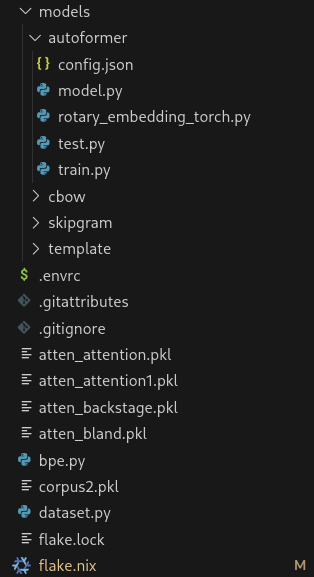
3. Adding Hydra jobs
It is necessary to outsource our models hyper parameters to an external config.json file saved in our projects folder. The project directory could look like this:
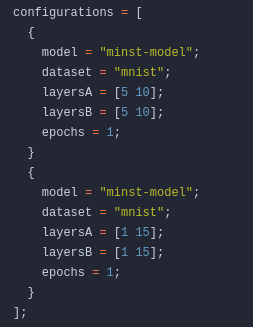
On line 145 we can define all hyper parameters, which then will be converted into the config.json file. We use lists [ /value1/ /value2/ … /valueN/ ] to permute our json. Multiple different config.json permuations will be concated by adding multiple configs to the configurations attrset.
Getting Hashes for file download
For adding datasets or other online resources it is recommended to download them over the Hydra. Hydra caches all the downloads. Therefor we just need to download online files once.
We define a new environment variable containing the path to the dataset like this:
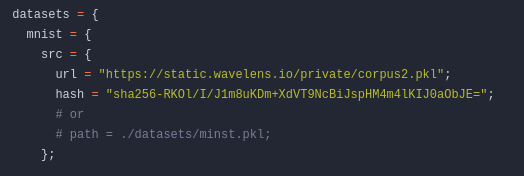
To ensure the files stay the same we need to provide a hash. This is done by executing the command: nix hash file [FILE]. We can also convert sha256 hashes to sri by executing nix hash to-sri --type sha256 "[HASH]".
4. Push and execute
After pushing to our git repository, we need to start a project at the web-interface from hydra.

We just need to define Identifier and Name. 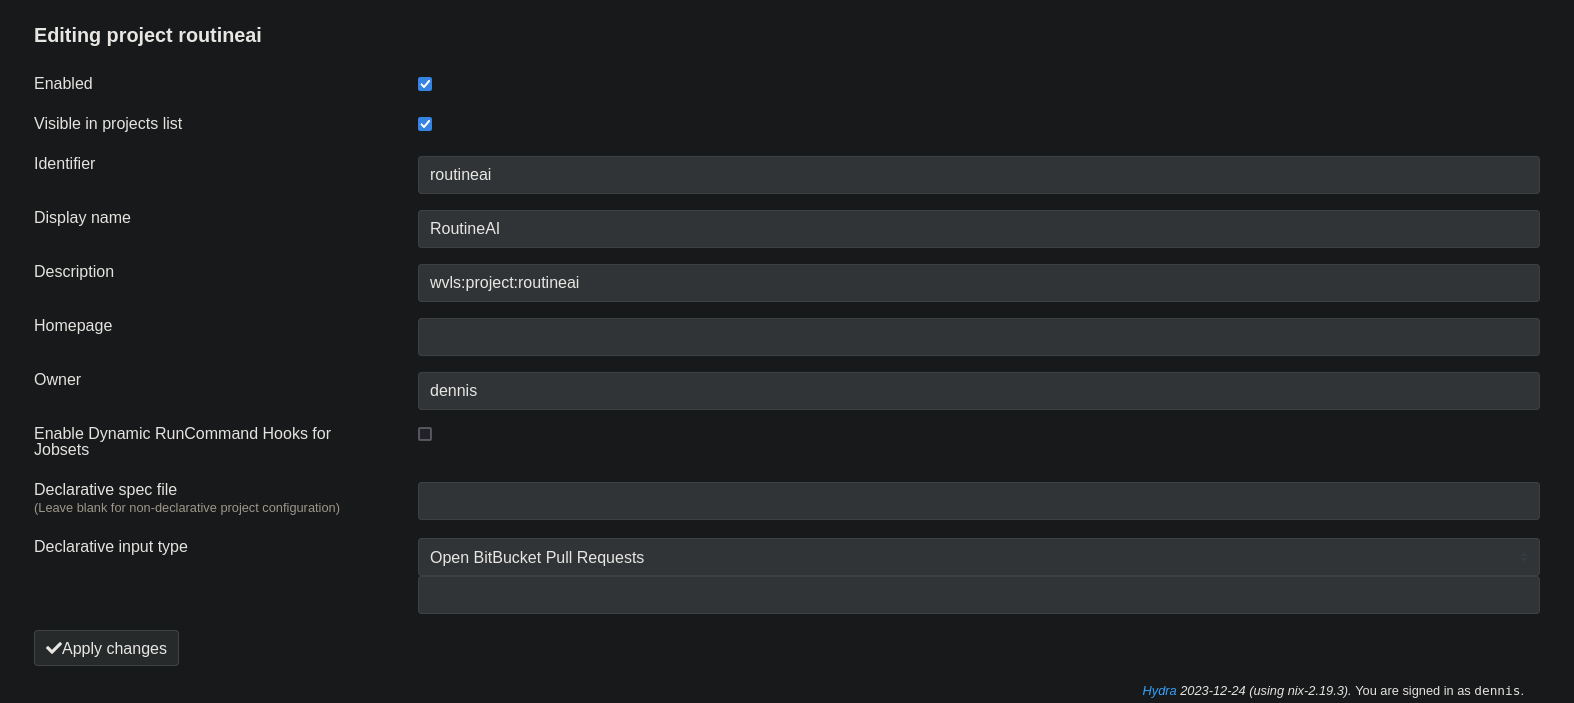
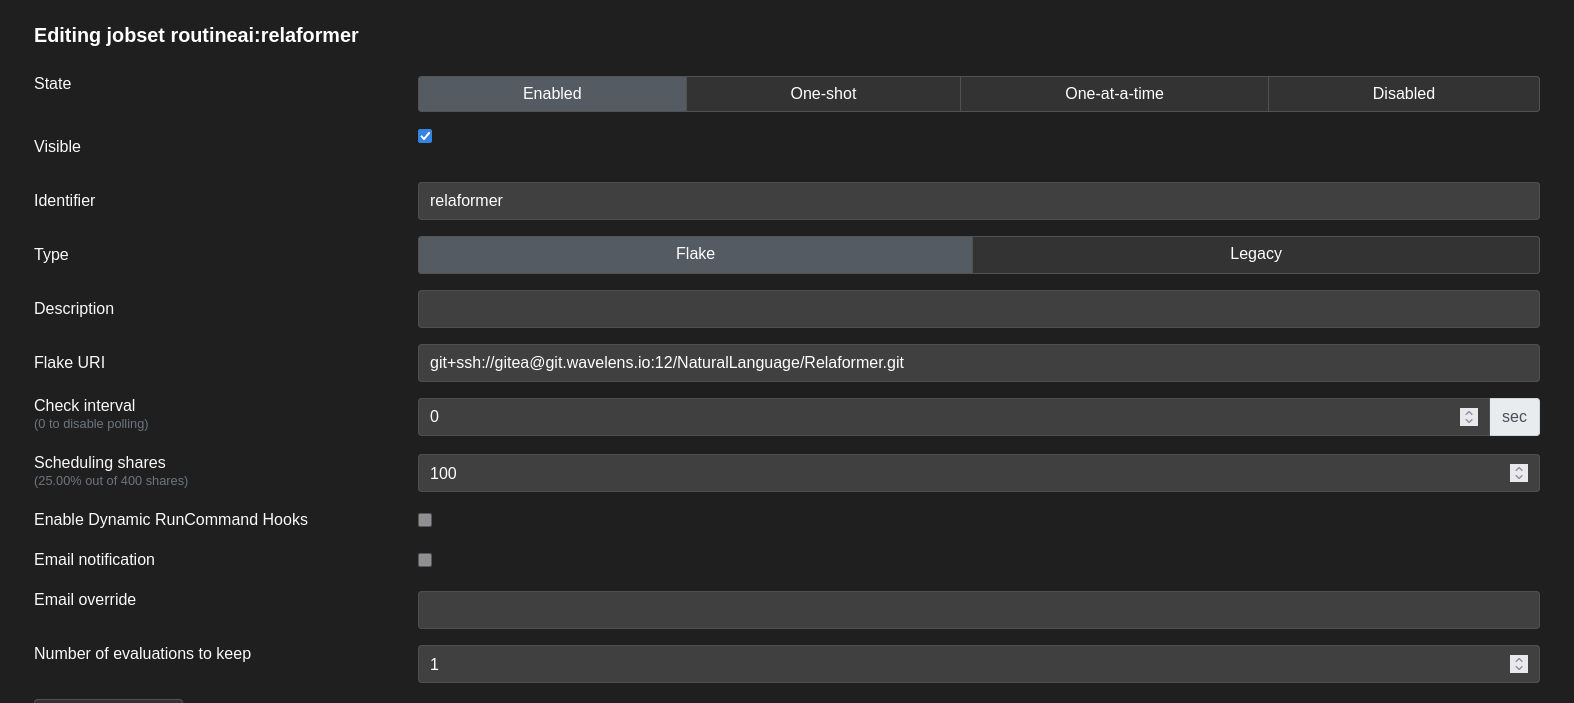
Afterwards we create a new Jobset found under the Actions dropdown menu and then define an Identifier, set the Flake-URI to our Git-Repository, the Check interval to zero, scheduling shares to 100, and Number of evaluations to keep to one (or how many model generations we want to keep).
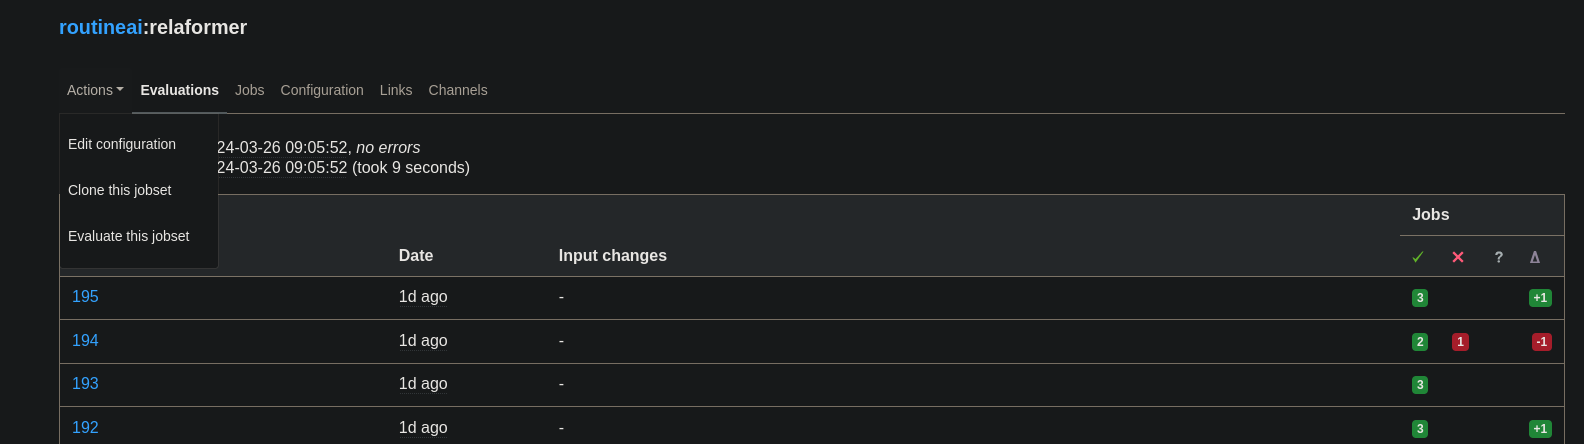
To then execute our Jobset we click on Evaluate this jobset under the Actions dropdown menu.
🎉 Congrats you have now started your first Hydra based AI Training 🎉